Friday, November 8, 2013

All Things Pumpkin

Have you ever noticed that in the fall literally everything is pumpkin flavored? I mean honestly, they even have a pumpkin flavored milkshake at some McDonald's, even though its almost too cold to enjoy something like that. Dr. Moghissi likes to take a little bit more of a healthy approach to all things pumpkin by making her own roasted pumpkin seeds. They are extremely easy to make (though it can sometimes take a while in the oven)...

First, go get a pumpkin! Next year, you could try this one with the insides of the pumpkin you carved for Halloween but since I was late on getting this out, you'll have to get another one.

These are our super awesome pumpkins from last year. Yes that is the Kool Aid man (that ones mine).
Ok so, gather all your ingredients together. You will need some olive oil, sea salt, butter and of course a pumpkin. You'll need to clean off the pumpkin seeds so they don't have any of the orange pumpkin goop on them.

After you clean your seeds, combine 3 parts butter, 3 parts olive oil and one part sea salt in a bowl and mix with your seeds. Dr. Moghissi used 3 tablespoons of butter, 3 tablespoons of olive oil and a tablespoon of salt for four cups of seeds. 


Spread the seeds out on a baking sheet. Since they are mixed with butter and olive oil, you don't need to use no-stick spray. Now, you really could do this with almost any kind of gourd seed. Dr. Moghissi decided to add butternut squash seeds to one of her batches.


Pop your seeds into an oven that has been preheated to 250 degrees. Cooking times can vary, but Dr. Moghissi pulled hers out after 90 minutes, and she gave them a quick toss every thirty minutes they were in the oven. 

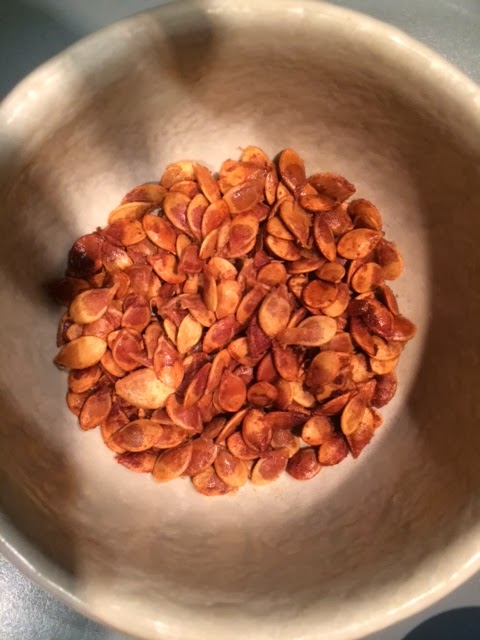
Fresh out of the oven pumpkin seeds

Her butternut squash seeds roasted a little bit faster than the pumpkin seeds. They were ready to come out after 60 minutes of cooking.


Once you pull the seeds out of the oven, let them cool a little bit so you don't burn your tongue and enjoy!!


Thursday, October 31, 2013

Dr. Moghissi's Kale Chips

I am not sure if you have noticed but it has been cold lately. Like really cold.
I grew up in Florida so anything under 75 is freezing.
This means that fall is just around the corner and with it comes all sorts veggies to experiment with. One such vegetable that Dr. Moghissi loves is kale. She comes in pretty much every day with a fresh batch of kale chips to munch on and she has graciously given me the recipe so that it can be shared with everyone!


Take some fresh kale (Dr. Moghissi gets hers from the local Farmer's Market) and tear it into chunks, about the size of a regular potato chip. How big or small you make the kale will alter your cooking time.

Toss your kale in olive oil and sea salt and place on a regular cookie sheet. The kale needs to be completely coated in olive oil when they hit the oven. Make sure that you spread the kale out so that the leaves are not overlapping too much. It'll help the kale get to uniform crunchiness. 
Cook your kale in a 350 degree oven for anywhere between 8-14 minutes. You want the kale to be crunchy but not burnt, so keep an eye on it. Just be forewarned, your house may smell after cooking kale like this (in a similar way to how brussel sprouts smell if that gives you any idea).

And voila! Here's the finished product of crunchy, good-for-you kale chips!

Thursday, October 10, 2013

Fun avec du chocolat et crêpes

When I was in high school, we were required to take a language in order to graduate and in my infinite 16 year old wisdom I decided to take French. I learned two things in that class. One was the only French phrase that I remember, "Je ne sais pas", and the other was that I hated crepes. My fiance thinks crepes are pretty awesome, and so over the weekend, I sucked it up and tried a new Paleo recipe that Dr. Moghissi brought from The Paleo Chocolate Lover's Cookbook by Kelly Brozyna for Vanilla Crepe Cake with Chocolate Cream. Despite my best efforts, my crepe cake turned out to not be Paleo, but I was still happy with it.


The recipe was actually super easy to follow and didn't call for too many ingredients.  It  called for liquid vanilla stevia extract, but thankfully I just made my own with some stevia packets, water and vanilla extract.


=


Pile-o-Dates


 In case anyone was wondering it is kind of difficult trying to use my 1 cup food processor to puree all the dates that were needed (I had to do it in two batches-don't judge).

Most awesome paleo-ish thing ever


But the end result was this super awesome chocolate cream for between the layers of crepes. The cream started out paleo and then veered a hard left into not paleo when I used butter instead of coconut oil and cornstarch instead of arrowroot powder.


Apparently I am 1. impatient and 2. not handy with a skillet. My crepes came out awful. They didn't actually come out at all, they just kind of died in the pan and then went to the trash.
It all went downhill from here


After I dumped the remaining batter into the trashcan, I went with Plan B, which was definitely not Paleo of me.


I then started to assemble my cake...
Believe it or not, this is 5 layers in...
And then continued to build my cake. Instead of blackberries, I went with raspberries because they added more color (and are yummy).


I don't know if you can tell in this picture, but the cake hasn't really gotten any taller, Dr. Moghissi thinks that if I had made my own it would've been taller. This is 10 crepes layered with the chocolate cream in between. It may not look it, but this cake is super rich, it would probably be good with some whipped cream too to kind of lighten it up. I guess crepes aren't really as awful as I thought they were, because I ate my fair share of this cake.


Thursday, September 26, 2013

I Scream, You Scream, We All Scream For...Grass Fed Ice Cream!

Yum!
Have you ever had grass fed ice cream? I didn't even know that existed until a couple weeks ago when I went with my roommate Leila (above) to Moo Thru in Remington, VA (www.moothru.com). Moo Thru is a walk up/drive thru that sells not only ice cream, which is reason enough to go, but also fresh milk in glass bottles from the owner's grass fed cows. I'm not joking when I say it was some of the best ice cream I have ever had, especially for the price.


Now, I'm not saying that you should go out and eat a gallon of ice cream and call it a day, but every now and again it's nice to treat yourself. When Leila and I went, there was already a line so I am sure that they ran out of a few flavors, but even still they had a pretty decent sized selection. The one Leila's holding above is actually the cone I ordered-2 scoops of blackberry in a freshly made waffle cone. It was a HUGE amount of ice cream!
This is actually a pretty small line for this place

When you go, be prepared to wait just a little bit, but trust me when I say it is well worth the wait. Just be prepared to get in trouble with your fiance if you go without him and don't bring him any home (sorry honey).


Friday, September 20, 2013

Fermentation Friday!

Does anybody know what this thing is? Anyone? I'll give you a hint, it has something to do with the other things on the table...

Cultures for Health Booth at Ancestral Health Symposium


If you guessed fermentation crock you're right! You get a cookie! Ok you don't get a cookie, cookies are bad for you (unless you can find a low carb cookie). But you can have a pickle that has been made by our very own Dr. Moghissi in a crock just like this one. She bought her crock from the Cultures for Health (http://www.culturesforhealth.com/) booth at AHS this year.

Say cheese Dr. Moghissi!

Pickles and other fermented foods are actually pretty good for you, they help with digestion and they also help balance good bacteria in your gut. Dr. Moghissi made her first batch last week, and this afternoon she shared her recipe with me...

You will need:
Fermentation Crock (Dr. Moghissi uses a gallon sized crock)
A couple cloves of garlic, smashed (for me, the more the merrier, but its completely up to you)
Dill
2 bags of black tea-tea has tannin (part of the makeup of the leaves) in it which keeps your pickles crunchy!
Salt Water-you will need 3 tablespoons of salt per quart of water
Cucumbers

So, now that you have your ingredients together, throw your cucumbers, garlic, dill, tea bags into the crock. Fill the crock with the salted water (so your pickles don't get mold) up to about an inch above the cucumbers so they are submerged.

Bubbles at the top mean that your pickles are fermenting!
There are weights that come with the crocks that you will need to weigh the pickles down so they don't float to the top of the water. Cover with the lid and let it ferment, checking on it every once in a while. Five days or so later, your pickles will be ready! Happy Eating! *Crunch Crunch*

Be ready to fend off your family (or staff members) for these crunchy delights.

Monday, September 16, 2013

Welcome to our first attempt at blogging!

For those of you that do not know, the Ancestral Health Symposium is a three day long convention where people from all over the country get together to talk about living like our ancestors did, which is the premise behind the Paleo lifestyle. Dr. Moghissi and I went to the one this year in Atlanta, where we heard three days worth of speakers talk about every topic under the sun. I came to the conclusion that though it may be extremely difficult for me to give up everything required to be a true follower of the Paleo lifestyle, I agree with the major premise that our food should be locally sourced and sustainable, and that grains are not the best for us health wise. 

Keeping that in mind, I decided that as a practice, we should start up a blog to share our thoughts, successes, failures, adventures and anything else that we can think of to not only help us, but to also help our patients, friend, family, etc. with their quest for a healthier lifestyle.

So, look forward to lots of recipe attempts and reviews, trips to the farmers market, and interesting articles in your future.


Enjoy!

A.K.